Category: Uncategorized (Page 6 of 10)

Undercarriage 7/23

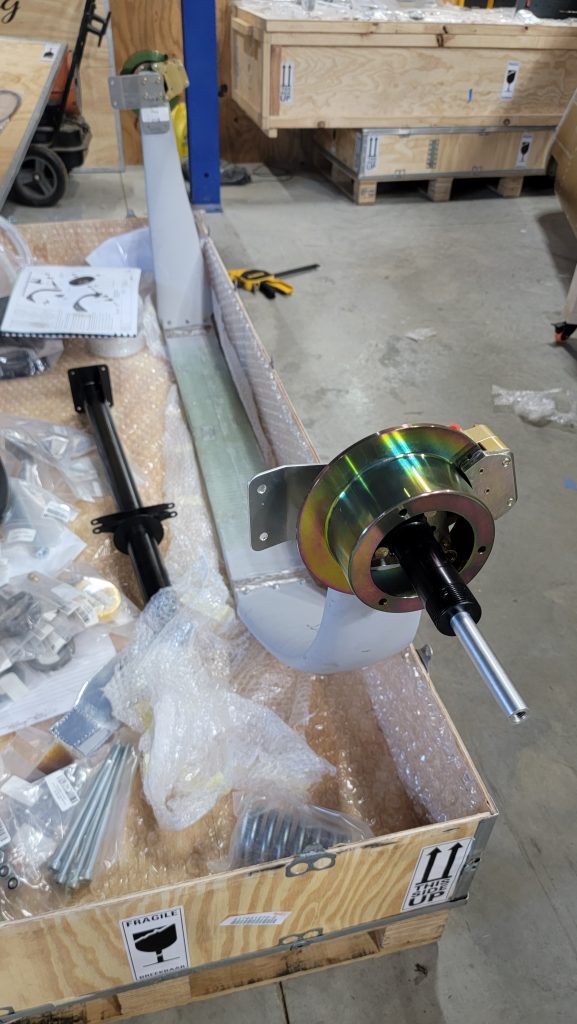
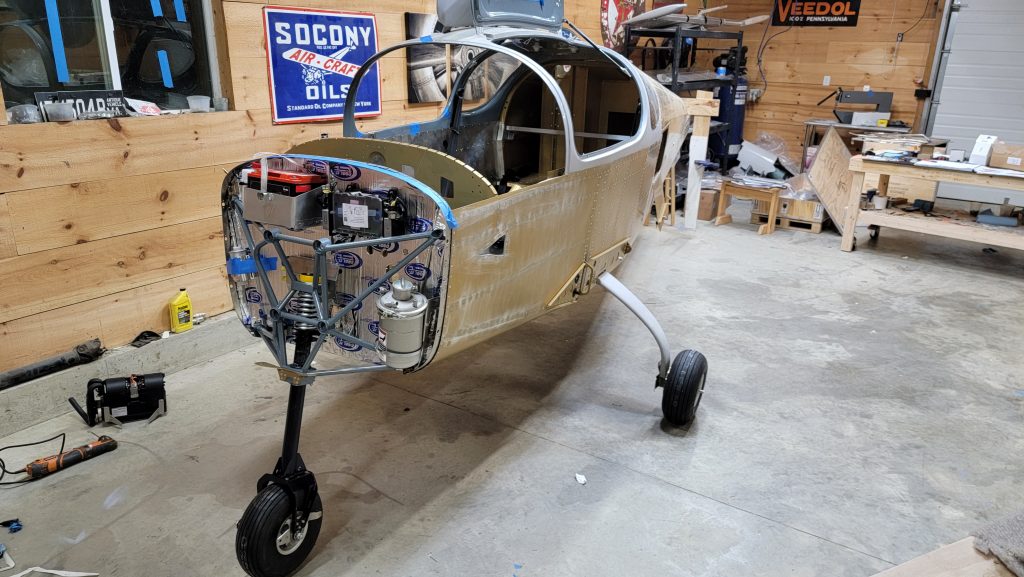
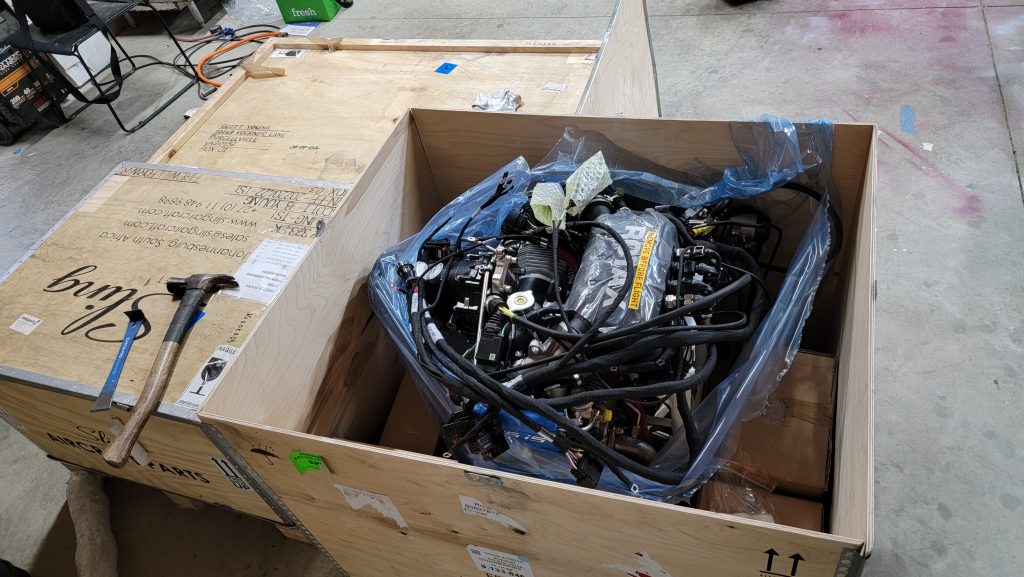
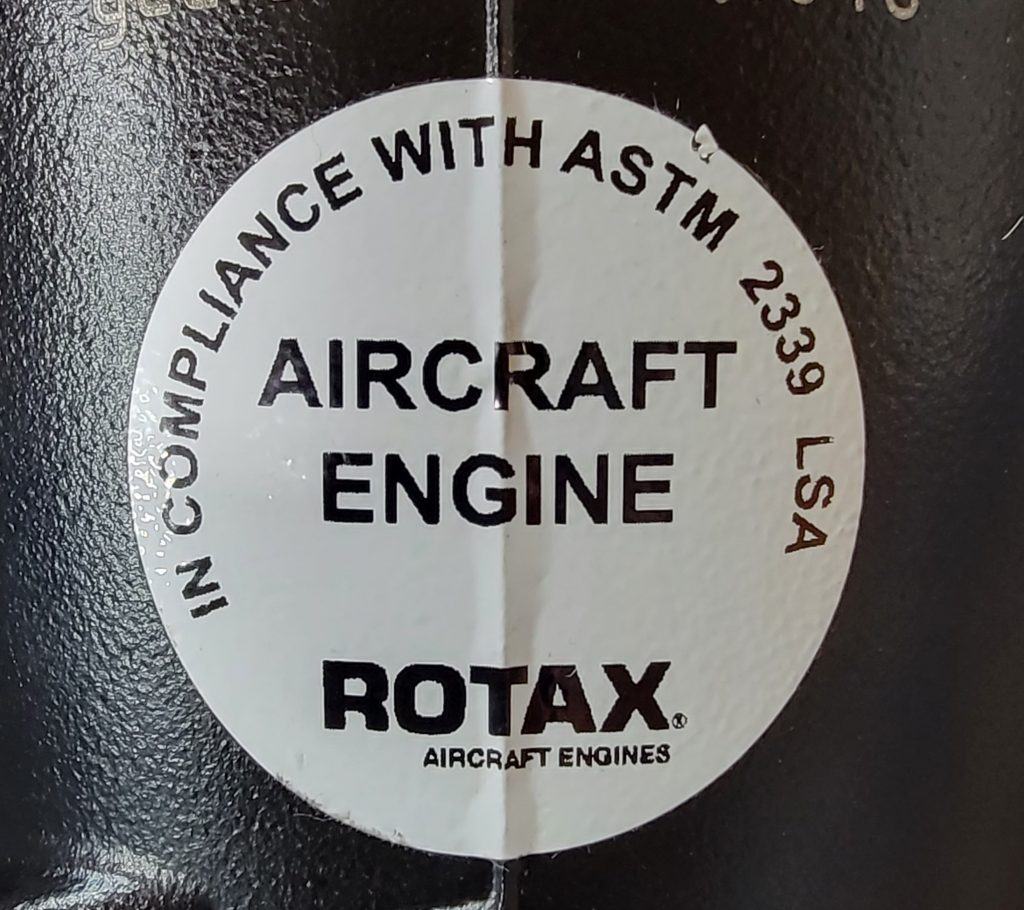
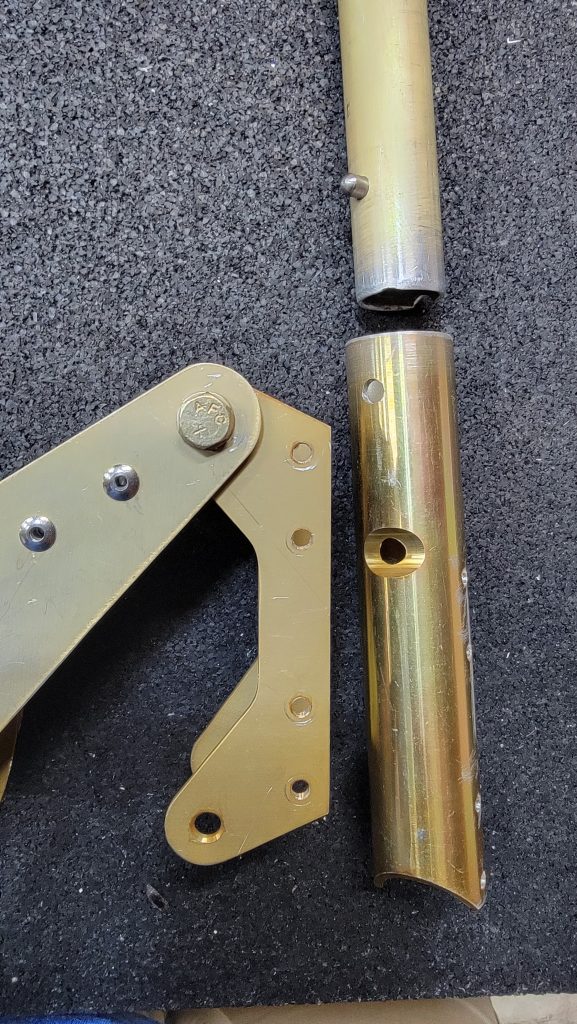
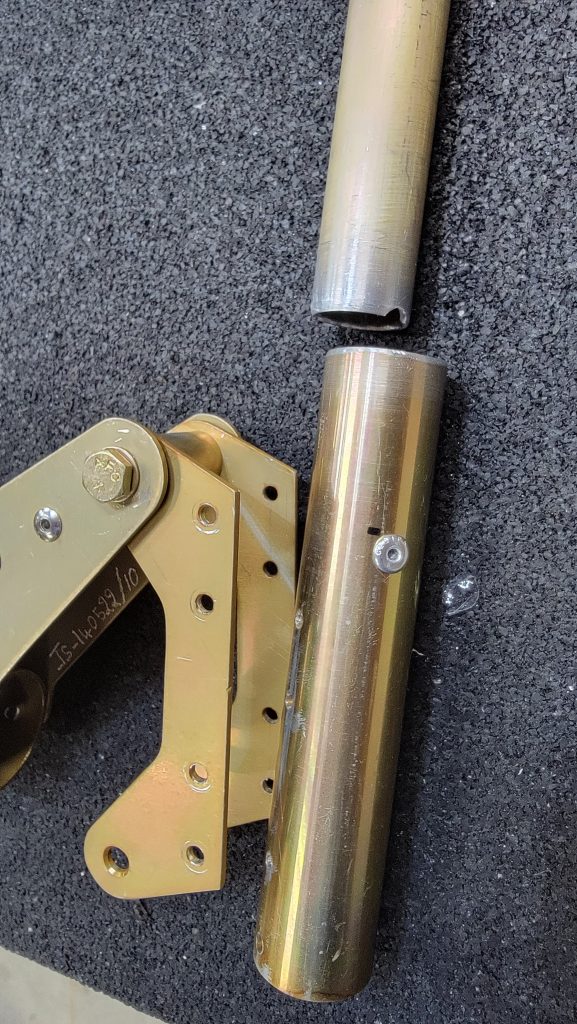
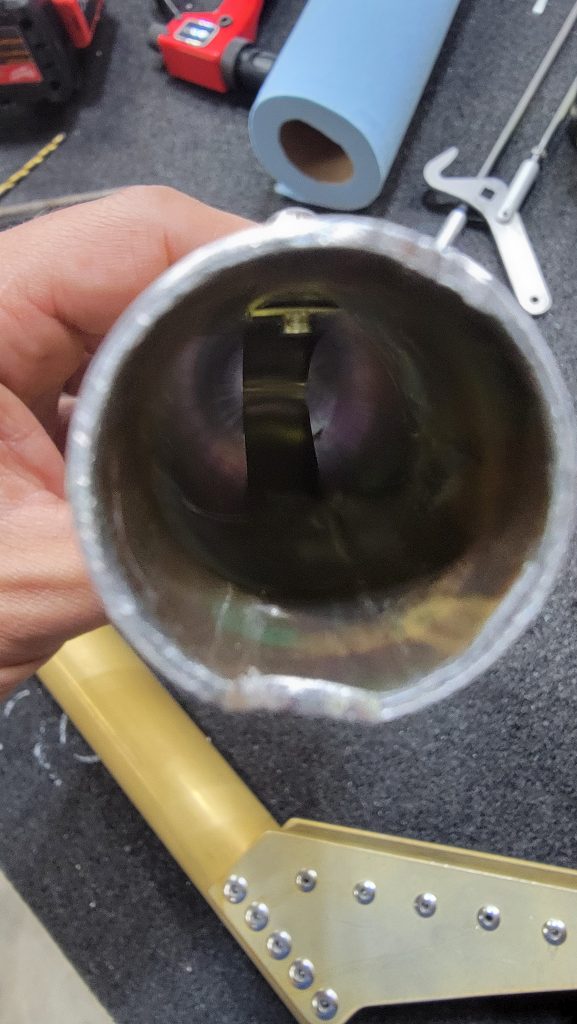
Undercarriage is now attached. I mounted the axles on the undercarriage before I attached it to the plane. I also mounted the axles on the undercarriage while it was upside down and backwards which presented quite a challenge to my ability to visualize things 3D. I do not recommend this approach. Had some problems figuring out how to get the tubes correctly mounted luckily a great fellow build blogger stepped in to help me a Mr Aaron Stampa. The tubes have to go in the hole and then back through the middle. That will make sense when you see the wheels. Also I found it easier to install the gasket that goes in between the two wheel house after I had the tube inside the tires and the tires mounted on the wheels. I then compressed the tire and simply slid the gasket on.

Static port

There’s much debate about the correct location for the static port. I have read that Torrance has disconnected it at the back of the dash. So they are using cabin pressure. But I read at some altitudes cabin pressure can be wrong. Factory says to put them in front of the cabin air intakes. But I read that people say that is also inaccurate. The only place that I have any feedback on that apparently returns an accurate pressure is from Evan and he says that is halfway back the tail. And my Cirrus also had the ports in that location. So out comes the drill and in goes the port. Of course I am missing the stock ports because they never came in my package from sling. So I bought my own ports from Aircraft Spruce and they actually bolt in from the inside, which I like that installation method better anyway. Drilling a hole into my quick build fuselage was very stressful. I did apply a very little RTV to the back side of the port before I screwed it in. I also used locktite on the bolt. It came out great.

Center Console and Rear seats

My rear seats are not going all the way back against the rear seat stops. They instead hit the outer walls of the plane. So I started to think about ways to fix that. Because I have the rear split seats, I don’t really like the way they join in the middle it feels weak, like a rambunctious kid could probably bend it and disconnect the two seats. So I put one square tube aluminum bar across the back of the seats. Now they rest against it. I created a quick disconnect system that allows it to slide in and out quickly and securely. On the passenger side the tube slides over a square nub and on the pilot side it slips down into a channel.

Also is a picture of my carbon fiber center glove compartment.

Most importantly everybody, it’s T- 14 days to Oshkosh EAA Airventure. See you all there !!!

Canopy Latch

I wasn’t happy with the looks of the factory latch. It reminds me of the cab that covered the back of my dad’s truck. Also, I was concerned that it stuck too far out into the wind and would cause drag. So I found these which are very solid metal and have a much smaller footprint. I did have to make the hole in the door a little larger and I had to file down the place where the lever attaches to the latch. It definitely doesn’t have as much of a handle to put your hand on but there is plenty of surface area to get a good enough grip to open the door. You can’t tell from the picture but it does have a lock built into it. All in all it was a pretty simple conversion. If you decide to do the same you can find these latches here, https://www.etrailer.com/CCNTRL/Pop-and-Lock/PAL9585.html

Rod end bearings for Sling TSI

Absolutely follow Slings guidance on this topic… Here’s some information for the curious mind… All the below rod ends fit into the relevant tubes and the eyes fit the relevant bolts 3/8″

A. Is a Aurora replacement rod end that 1/4 handles 2100lbs and the 5/16 handles 2800lbs GMM-4M-470 https://www.pilotshop.com/catalog/appages/aurorabearings.php

B. Is suppose to handle 1700lbs and is what comes with the sling kit as of before mid 2022. This is the rod end being recalled.

C. Is a uxcell replacement rod end.

Sling TSI fuel to wing connections

I believe the way from the factory is to run rubber lines straight from the fuel selector to the fuel tanks,,, I’m not comfortable running rubber through a metal wall. There’s the aspect of it rubbing, there’s the aspect of a fire getting through the hole, and the aspect of creating a draft that might be noisy or make the cabin cooler. And none of those seem desirable. Also inside of the cabin I’m using aluminum lines so it never has to be replaced, hopefully. So I connected these hard connections through the wall instead. But I must say that all of these customizations do really increase your build time.

Engine has arrived, Rotax 915 !!

All my birthdays rolled into one. My engine and firewall forward kit has arrived. The factory was also supposed to send me about 75 of my missing parts. But somehow I only received about half of them.

And it would appear the factory’s now including photos of the people who pack your kits which is a very nice touch. Thank you Zanele !! Lovely name also.

Removable Co pilot stick

I frequently find myself traveling with passengers not other pilots. In the past I have tried to have some of my passengers attempt to fly the plane but they usually are resistant to that. And it seems like my co-pilot frequently puts an emphasis on comfort rather than being a co-pilot. So to that end I have made my co-pilot stick removable. I did not run any wires through it. I know I could have because I put the time into figuring out how to do that. I just felt like wires would make it more problematic. So I’m mounting a push to talk on the control panel. The stick itself is indexed at the bottom as you can see from the pictures. There’s a round notch so it always aligns the same way. The round notch that I filed into the bottom of the stick aligns with a large rivet that I put in the larger stick. The rivet also stops the smaller stick from going down in too far. Also there is a snap button that pops out so it can’t easily be removed once it is put in. The snap button was very easy to find on Amazon. The stick fits in tightly and feels very sturdy. I was able to just use all the original parts by drilling out the original stick.

Customizing the controls like this would worry me more but it doesn’t because the pilots stick , which has not been customized, can easily be reached from the passenger seat if need be.

« Older posts Newer posts »